(+44) 7900 515 552
21 Oct 2026
 insurance backed guaranteeinsurance backed guarantee
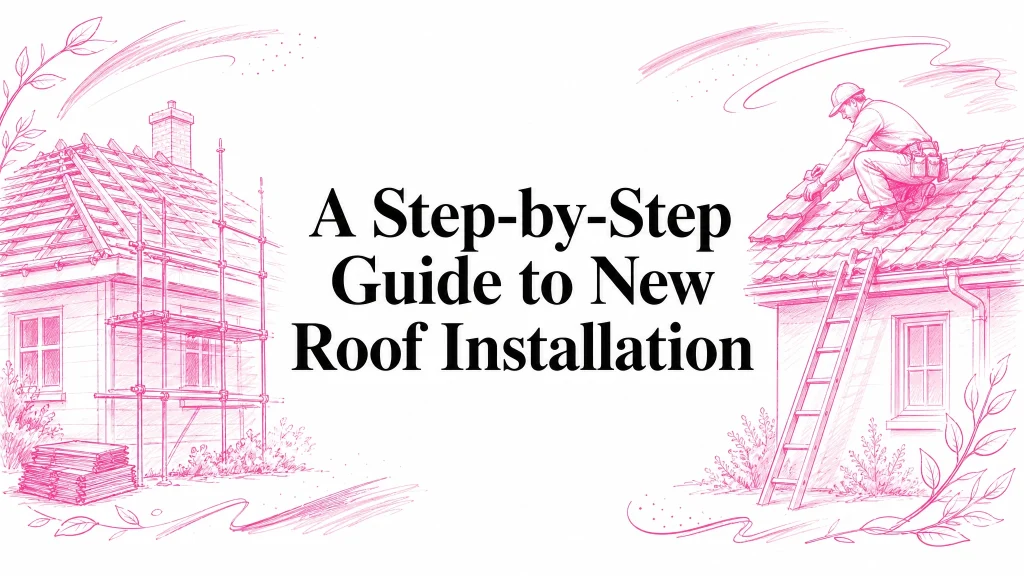
Installing a new roof is a major investment and a significant step in improving your home’s durability, aesthetics, and value. A professionally installed roof not only protects your home but also enhances its curb appeal. If you’re considering a new roof installation, this step-by-step guide will take you through the entire process, helping you understand what to expect at each stage.
Before you get to the step-by-step walkthrough below, it’s worth working out whether you actually need a full new roof, what material makes sense for your house, and roughly what it should cost. This guide covers all of that first, then takes you through exactly what happens once work starts.
Some roofs make the decision obvious. Others don’t. A roof can look tired from the garden but still have years left in it. On the other hand, a roof can look passable from the street while letting in water through hidden weak points around flashing, valleys or underlay.
Storm damage has made that distinction more important across the South East. The Association of British Insurers reported that weather-related roof claims reached £1.2 billion in 2023, a 22% increase from 2022, and in some Berkshire and Surrey towns over a third of post-winter storm claims required a complete new roof rather than a repair. After rough weather, what looks like a minor issue can indicate wider failure.
Start at ground level. You don’t need to climb a ladder for the first check. Look for slipped or missing tiles (several across different slopes usually means the fixings beneath are failing, not just one unlucky tile), cracked or spalled tiles, heavy moss growth holding moisture against the surface, an uneven or wavy roof line, and worn ridge or hip mortar.
Indoor clues matter just as much, and homeowners often miss them: brown water marks on ceilings or around chimney breasts, damp insulation in the loft, daylight showing through where it shouldn’t, musty smells after rain, and timber that feels damp, soft or stained. Not every leak drips straight down — water can travel along timbers or underlay before showing up somewhere that seems unrelated to the actual source higher up.
A roof doesn’t need to be collapsing to justify replacement. Sometimes the real issue is that too many parts are failing at once.
Repairs are the right call when damage is isolated — a few slipped tiles or one cracked flashing detail can usually be sorted without touching the whole roof. Replacement becomes the more sensible route when the same problem keeps returning, defects show up on several slopes at once, the loft has repeated moisture issues, the roofline is visibly sagging, or past repairs are patchy and mismatched. If you’re unsure, ask yourself three things: has the same problem come back more than once, can you see defects in more than one area, and does it seem worse after wind-driven rain? Three yeses usually means a full inspection is the next step, not another patch repair.
The best material for a new roof installation isn’t always the most expensive one. It’s the one that fits the house, the roof shape, the local weather, and the budget you can live with. For pitched roofs, most UK homeowners are comparing natural slate, clay tiles, and concrete interlocking tiles. Slate gives a classic appearance that suits many period properties; clay tiles carry a similar traditional character; concrete tiles are the practical, widely-available choice for modern semis and detached homes. For flat roofs, the conversation shifts to high-performance felt, GRP fibreglass, or EPDM — see our guide to the best roofing materials for flat roofs if that’s the section of your property in question.
Insulation matters as much as the outer covering, and it’s the part homeowners forget to ask about. Current UK Building Regulations Part L require new roofs to achieve a U-value of 0.13 W/m²K or less, which typically means around 300mm of high-performance insulation — enough to cut heat loss through the roof by roughly a quarter. When a roofer talks you through insulation boards, breathable membranes and ventilation, that’s not a detour from the main conversation; it’s whether the roof will actually perform once it’s fitted.
| Material | Average Lifespan | Typical Cost | Best For |
|---|---|---|---|
| Natural slate | Long-lasting | Higher | Period homes and premium finishes |
| Concrete tiles | Varies by product and installation quality | Mid-range | Modern homes and practical replacements |
| Clay tiles | Long-lasting | Higher upfront | Traditional homes and character properties |
| Felt/GRP/EPDM (flat roofs) | Shorter than premium options, varies by system | Lower upfront | Flat roofs where budget is the main driver |
Before you settle on a material, ask whether it suits your roof pitch, whether it’ll look right against neighbouring properties, whether the existing structure can take the weight, and what’s included beneath the visible covering. Those questions lead to better decisions than picking the cheapest sample board on the table.
The journey to a new roof begins with an initial consultation, where a roofing expert will assess your requirements, discuss your budget, and outline expectations. This consultation allows the contractor to tailor the project to your specific needs and vision, whether you’re focused on budget or particular materials. This is a great time to ask any questions, like what to expect when getting a new roof quote or to gain insights into project timelines.
Next, a thorough roof inspection will be conducted to check for any damage, assess structural integrity, and accurately measure dimensions. This inspection is vital to understanding potential repairs or reinforcements needed, which can influence your roof replacement costs. Accurate measurements ensure materials are ordered precisely, minimising waste and helping keep your project on budget.
The choice of roofing material and design is a critical step in any new roofing project, as it impacts durability, style, and functionality. Here’s a look at some popular roofing options:
Each material has its benefits, so consult with your contractor to choose the best roofing material for your climate, budget, and style.
Before the installation, the team will prepare the area around your home to ensure minimal disruption. Protecting landscaping, setting up scaffolding, and laying tarps all help keep the workspace tidy and safeguard your property. A clean, organised site is essential for a smooth-running roofing project.
In most cases, replacing a roof involves tearing off the old materials. This removal process is thorough, with debris carefully handled and disposed of to maintain a clean work area. Proper disposal of old roofing material helps prepare a fresh, stable surface for your new roof installation, setting the stage for a durable result.
With the old roof removed, the underlying roof deck – the structural base – is inspected. This step is crucial, as any weak spots or signs of rot must be repaired before the new roof is installed. A solid deck ensures your roof will be stable and secure, supporting the longevity of your roof investment.
To create a strong barrier against water, your contractor will first install underlayment over the roof deck. Flashing, a protective sealant around vulnerable areas like chimneys and vents, is also added at this stage. Together, these elements help to prevent water damage, safeguarding your new roof and the integrity of your home.
With the foundation in place, it’s time to install the primary roofing material, whether shingles, tiles, metal, or slate. Each material requires a specific installation technique to ensure durability and appearance. Experienced contractors will carefully align and secure each piece, providing a tight, weather-resistant finish for your new roof.
The quality of fixing at this stage is a real issue in the windier parts of the South East. Under BS 5534, each tile must be secured with a minimum of two 3.35mm nails to resist wind uplift, and inadequate fastening is linked to the large majority of wind-related roofing failures. Neat workmanship here isn’t just about appearance — it’s what stops the roof shifting when a strong gust hits.
After the main roofing material is installed, ridge caps are carefully added along the roof’s highest points. These are followed by ventilation elements designed to regulate attic temperature and moisture effectively. Together, these finishing touches not only improve the overall performance of your roof but also enhance your home’s energy efficiency. Ensuring a professional touch during this stage guarantees that your roof remains both functional and visually appealing for years to come.
Once the installation is complete, a final inspection is conducted to ensure that everything meets strict quality and safety standards. During this review, the team checks for any issues with alignment, proper sealing, and overall workmanship. This thorough quality assurance process is crucial for confirming that your roofing project has been completed to the highest standard. As a result, you can have peace of mind knowing your new roof is durable, secure, and built to perform reliably.
After the final inspection, the team will thoroughly clean up the worksite by removing any debris, thereby leaving your property in pristine condition. Additionally, your contractor might provide valuable tips on post-installation care. For instance, they may recommend regularly cleaning your gutters or inspecting the roof following severe weather conditions. By following this advice, you can effectively maintain your roof, prolong its lifespan, and maximise the return on your investment.
Roof prices vary because roofs vary. A simple semi-detached house with straightforward access is a very different job to a larger detached property with chimneys, valleys, rooflights and awkward detailing. The visible material affects cost, but so do labour, waste removal, scaffolding, insulation upgrades, access, and whatever hidden timber repairs turn up once the old roof is stripped — which is why two quotes can look far apart even when both mention a “new roof”. For a fuller breakdown of what moves the number, see our guide on the factors that influence new roof costs.
The cheapest quote can end up the most expensive one if corners are cut on underlayment, ventilation or detailing. Ask for a written quote that spells out strip and disposal, membrane and battens, flashing work, the insulation allowance, scaffolding and waste, and how any unexpected timber repairs would be priced if they turn up once the old roof comes off. A clear contractor will also give you a realistic working window rather than an overconfident promise, and explain how they’ll protect the property if the weather turns halfway through the job.
The success of a new roof installation comes down to one decision more than any other: who you hire. Two contractors can quote for what sounds like the same job and deliver very different results, so it’s worth checking public liability insurance, trade body membership, and recent local work before you sign anything — not after the scaffold’s already up. We’ve put together our full guide to choosing a roofer, covering exactly what to check and the red flags to walk away from.
A new roof should give you peace of mind, but that doesn’t mean ignoring it for years at a time — roofs last longer when small issues are caught early. Keep it simple: check gutters twice a year, look in the loft after heavy rain for damp smells, stains or wet insulation, trim back overhanging branches, and arrange the occasional professional inspection to catch minor defects before they spread. Avoid climbing onto the roof yourself unless it’s genuinely necessary and safe, and steer clear of aggressive pressure washing on older coverings. A roof doesn’t need constant fuss, just sensible attention now and then.
That depends on the material, the roof design, the local conditions and, above all, the quality of installation. A well-fitted roof should serve for many decades, while a poorly fitted one can run into trouble far sooner than it should.
A competent roofing team won’t leave your property open and hope for the best. They stage the work carefully and use temporary weather protection if conditions turn mid-job.
It can be noisy during stripping and loading out, and there will be scaffold traffic while materials go up and down. It shouldn’t be chaotic though — good roofers keep waste controlled and tidy the site continuously rather than leaving everything to the final day.
If the problem is isolated, a repair may well be enough. If defects are widespread, recurring, or linked to the roof system as a whole rather than one weak spot, replacement is usually the more sensible long-term decision.
A new roof installation is a complex process; however, each step is essential to achieving a durable, high-quality result. By partnering with experienced professionals, you can ensure that each phase is handled with care and precision. From the initial consultation to the final inspection, every stage plays a vital role in delivering a successful roofing project.
If you’re ready to start your roofing journey, contact All Custom Roofing for a detailed estimate and expert advice tailored to your needs. With the right team, you can look forward to a smooth, efficient, and stress-free experience.
If your property is listed or sits in a conservation area, there are extra rules to check before any re-roof begins. Our guide on planning permission for roof replacement in the UK covers when permission is and is not needed.